Back Up On-premise Files and Folders using Microsoft Azure Recovery Services (MARS) Agent
Backing up on-premises resources to the cloud leverages the power and scale of the cloud to deliver high-availability with no maintenance or monitoring overhead. With Azure Backup service the benefits keep adding up, right from data security to centralized monitoring and management.
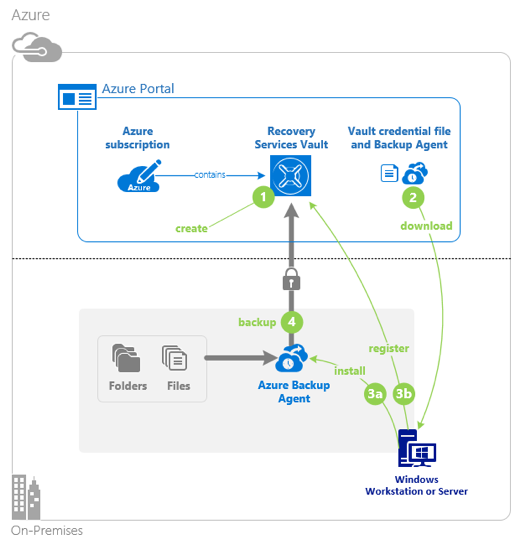
Azure Backup service uses the MARS agent to back up files, folders, and system state from on-premises machines and Azure VMs. The backups are stored in a Recovery Services vault.
In this article, we will look at how to back up on-premise files and folders using Microsoft Azure Recovery Services (MARS) agent.
There are two ways to run the MARS agent:
- Directly on on-premises Windows machines.
- On Azure VMs that run Windows side by side with the Azure VM backup extension.
Here is the step by step process.
Create a Recovery Services vault
1. Sign in to the Azure portal.
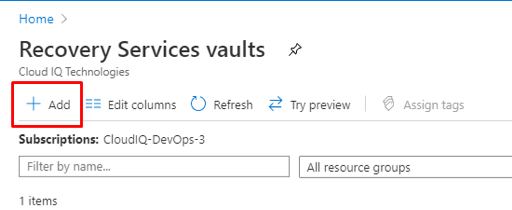
2. On the Recovery Services vaults dashboard, select “Add”.
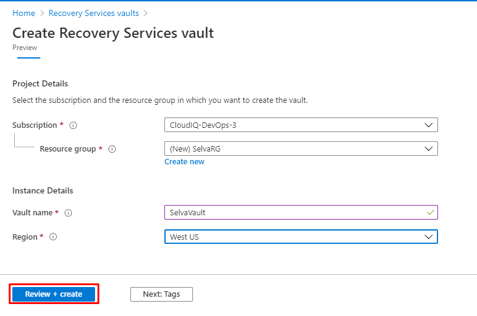
3. The Recovery Services vault dialog box opens. Provide values of the Name, Subscription, Resource group, and Location.
4. Select “Create”.
Download the MARS agent
1. Download the MARS agent so that you can install it on the machines that you want to back up.
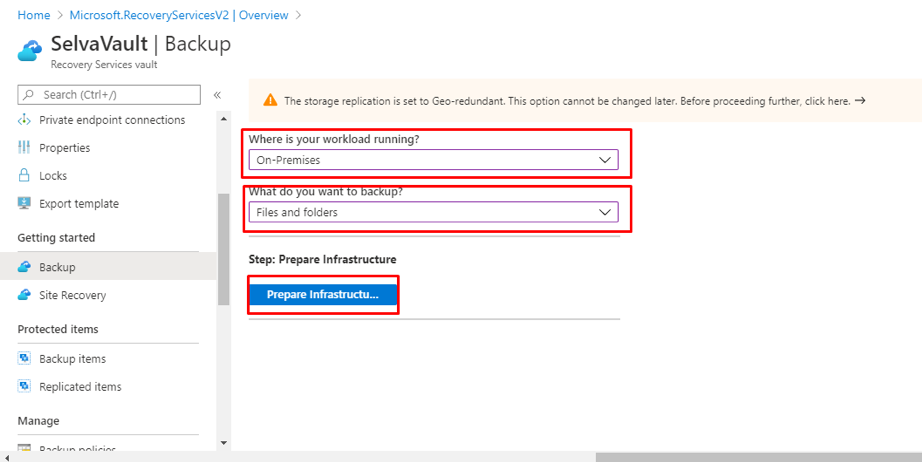
2. In the vault, select “Backup”.
3. Select On-premises for “Where is your workload running?”
4. Select Files and folders for “What do you want to back up?”
5. Select “Prepare Infrastructure”.
5. For “Prepare infrastructure”, under Install Recovery Services agent, download the MARS agent.
6. Select “Already downloaded or using the latest Recovery Services Agent”, and then download the vault credentials.
7. Select “Save”.

Install and register the agent
1. Run the MARSagentinstaller.exe file on the VM.
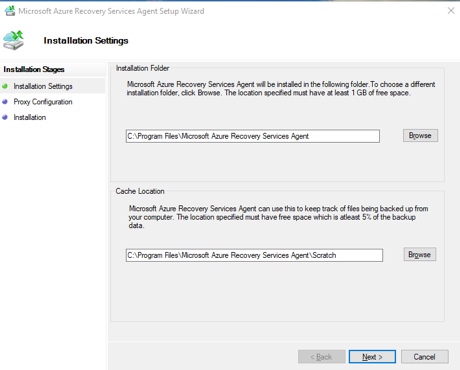
2. In the “MARS Agent Setup Wizard”, select “Installation Settings”.
3. Choose where to install the agent and choose a location for the cache. Select “Next”.
- The cache is for storing data snapshots before sending them to recovery services vault.
- The cache location should have free space equal to at least 5 percent of the size of the data you’ll back up.
4. For Proxy Configuration, specify how the agent that runs on the Windows machine will connect to the internet. Then select “Next”.
5. For Installation, review, and select “Install”.
6. After the agent is installed, select “Proceed to Registration”.
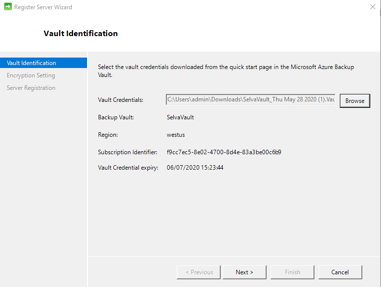
7. In Register Server Wizard > Vault Identification, browse to and select the credentials file. Then select “Next”.
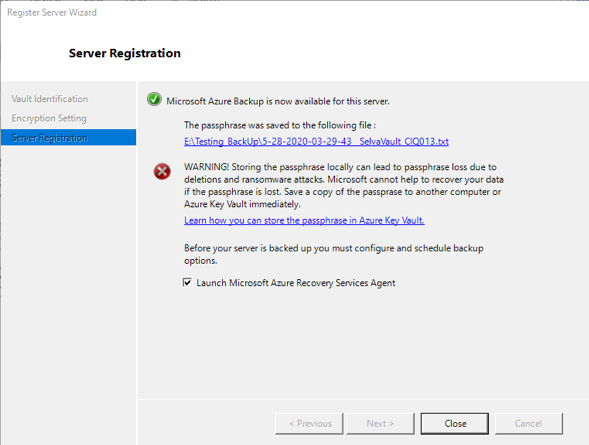
8. On the “Encryption Setting” page, specify a passphrase(user-defined) which is used to encrypt and decrypt backups for the machine.

9. Save the passphrase in a secure location. It is needed while restoring a backup.
10. Select “Finish”.

Create a backup policy
Steps to create a backup policy:
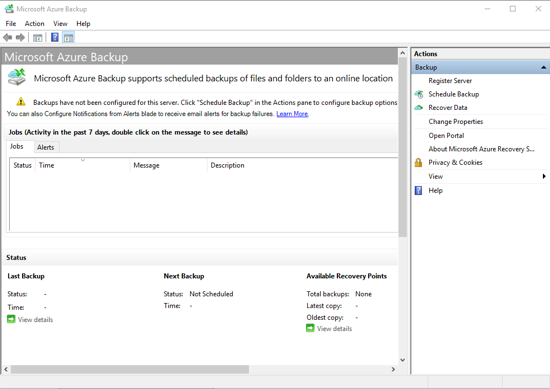
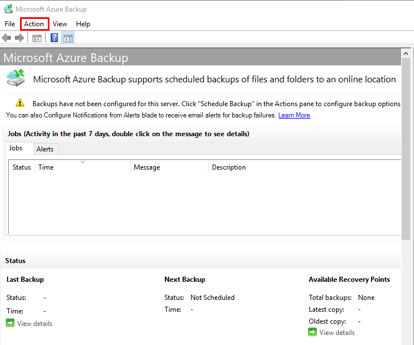
1. Open the MARS agent console.
2. Under “Actions”, select “Schedule Backup”.
3. In the “Schedule Backup Wizard”, select “Getting started” and click “Next”.
4. Under “Select Items to Back up”, select “Add Items”.
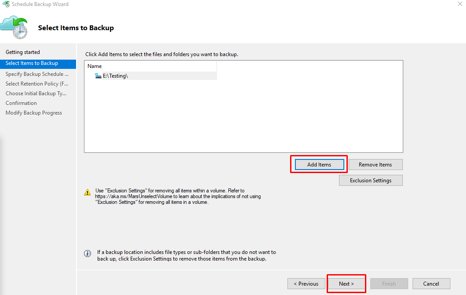
5. Select items to back up, and select OK.
6. On the “Select Items to Back Up” page, select “Next”.
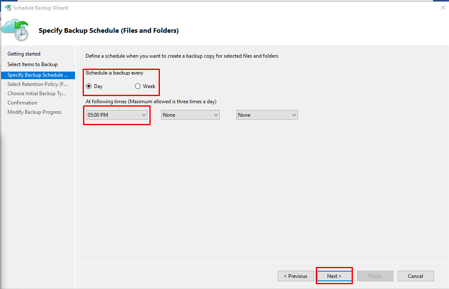
7. Specify when to take daily or weekly backups in the “Specify Backup Schedule” page and select “Next”.
8. It is possible to schedule up to three daily backups per day and can run weekly backups too.
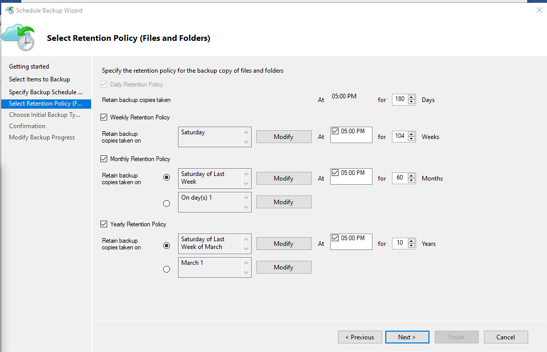
9. On the “Select Retention Policy” page, specify how to store copies of your data. And select “Next”.
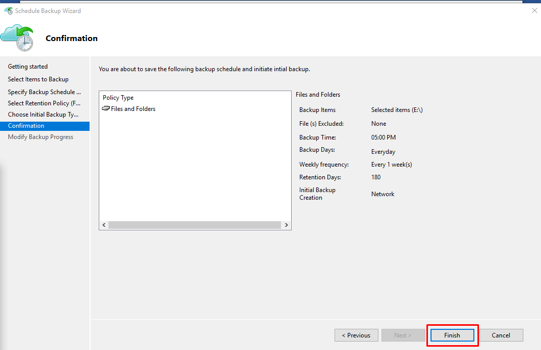
10. On the Confirmation page, review the information, and then select “Finish”.
11. After the wizard finishes creating the backup schedule, select “Close”.
We hope this step by step guide helps you back up on-premise files and folders using Microsoft Azure Recovery Services (MARS) agent.
Share this:
CloudIQ is a leading Cloud Consulting and Solutions firm that helps businesses solve today’s problems and plan the enterprise of tomorrow by integrating intelligent cloud solutions. We help you leverage the technologies that make your people more productive, your infrastructure more intelligent, and your business more profitable.
LATEST THINKING
INDIA
Chennai One IT SEZ,
Module No:5-C, Phase ll, 2nd Floor, North Block, Pallavaram-Thoraipakkam 200 ft road, Thoraipakkam, Chennai – 600097
© 2023 CloudIQ Technologies. All rights reserved.