Integrating Azure Data Lake Storage with Databricks: Step-by-Step Guide
There are four different ways of accessing Azure Data Lake Storage Gen2 in Databricks. However, using the ADLS Gen2 storage account access key directly is the most straightforward option. Before we dive into the actual steps, here is a quick overview of the entire process
- Understand the features of Azure Data Lake Storage (ADLS)
- Create ADLS Gen 2 using Azure Portal
- Use Microsoft Azure Storage Explorer
- Create Databricks Workspace
- Integrate ADLS with Databricks
- Load Data into a Spark DataFrame from the Data Lake
- Create a Table on Top of the Data in the Data Lake
Microsoft Azure Data Lake Storage (ADLS) is a fully managed, elastic, scalable, and secure file system that supports HDFS semantics and works with the Apache Hadoop ecosystem. It is built for running large-scale analytics systems that require large computing capacity to process and analyze large amounts of data
Features:
Limitless storage
ADLS is suitable for storing all types of data coming from different sources like devices, applications, and much more. It also allows users to store relational and non-relational data. Additionally, it doesn’t require a schema to be defined before data is loaded into the store. ADLS can store virtually any size of data, and any number of files. Each ADLS file is sliced into blocks and these blocks are distributed across multiple data nodes. There is no limitation on the number of blocks and data nodes.
Auditing
ADLS creates audit logs for all operations performed in it.
Access Control
ADLS provides access control through the support of access control lists (ACL) on files and folders stored in its infrastructure. It also manages authentication through the integration of AAD based on OAuth tokens from supported identity providers.
Create ADLS Gen2 using Portal:
- Login into the portal.
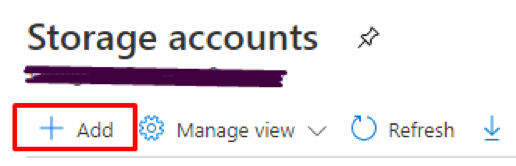
- Search for “Storage Account”
- Click “Add”
4. Choose Subscription and Resource Group.
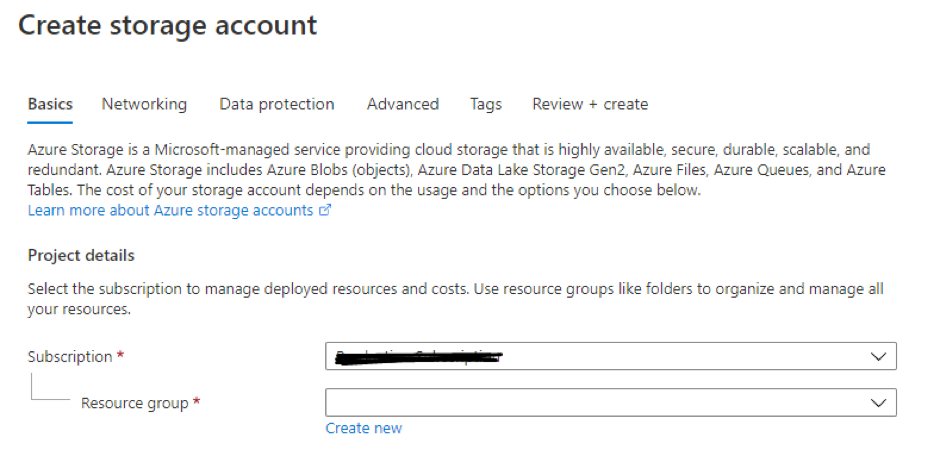
5. Give storage account name, location, kind, and replication.
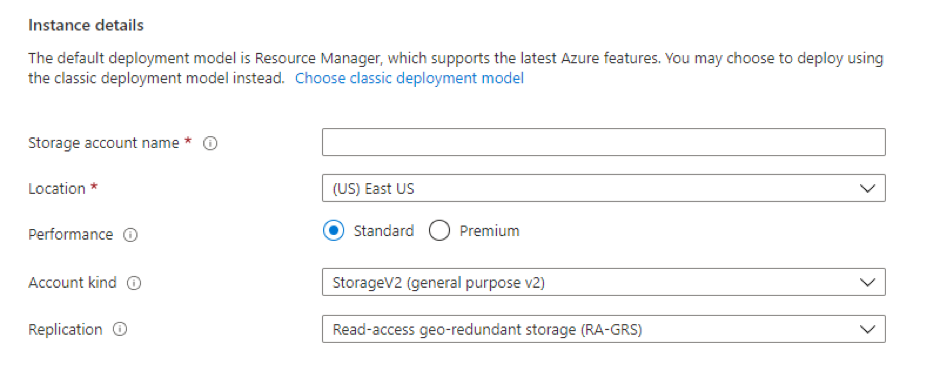
6. In the Advanced Tab, set Hierarchical namespace to Enabled

7. Click “Review+Create”
Microsoft Azure Storage Explorer
Microsoft Azure Storage Explorer is a standalone app that makes it easy to work with Azure Storage data on Windows, macOS, and Linux. Microsoft has also provided this functionality within the Azure portal which is currently in preview mode.1.
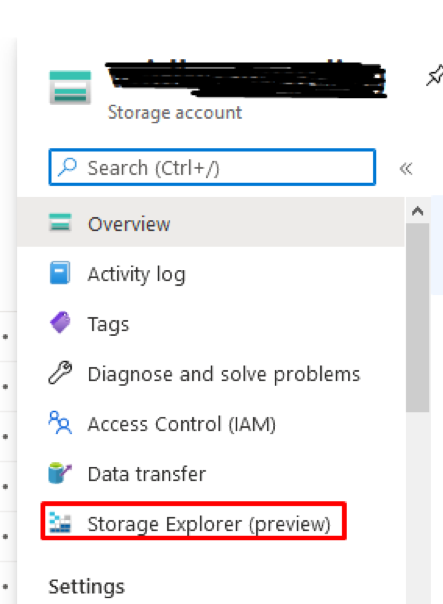
- Navigate back to your data lake resource in Azure and click ‘Storage Explorer (preview)’.
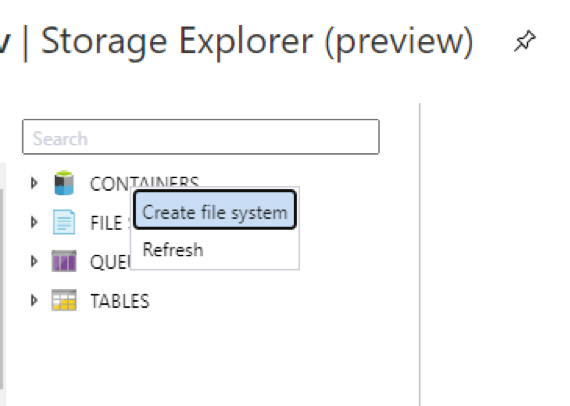
2. Right-click on ‘CONTAINERS’ and click ‘Create file system’. This will be the root path for our data lake.
3. Name the file system and click ‘OK’.
4. Now, click on the file system you just created and click ‘New Folder’. This is how we will create our base data lake zones. Create folders.
5. To upload data to the data lake, you will need to install Azure Data Lake explorer using the following link.
6. Once you install the program, click ‘Add an account’ in the top left-hand corner, log in with your Azure credentials, keep your subscriptions selected, and click ‘Apply’.
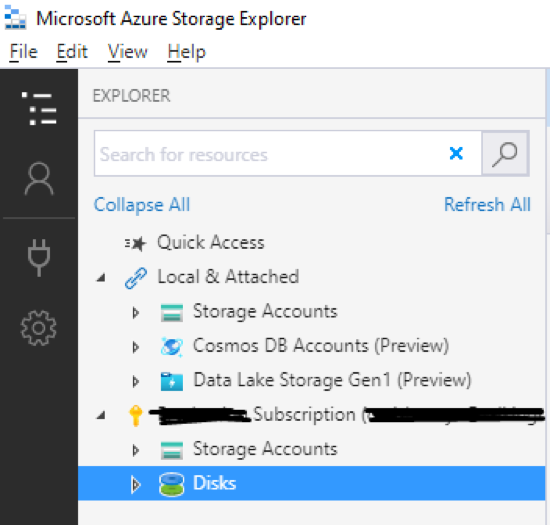
7. Navigate down the tree in the explorer panel on the left-hand side until you get to the file system you created, double click on it. Then navigate into the folder. There you can upload/ download files from your local system.
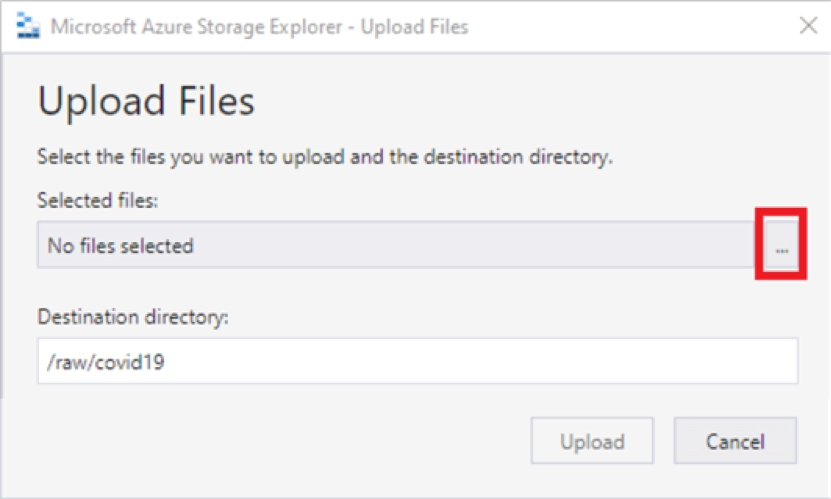
8. Click “Upload” > “Upload Files”. You can get sample data set from here.
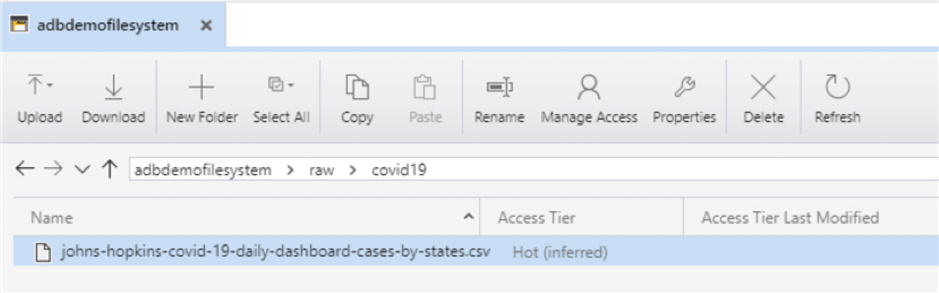
Sample Folder structure:
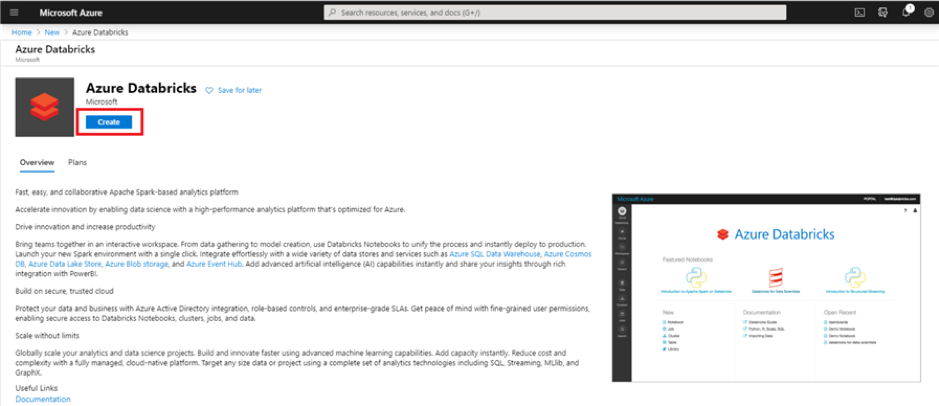
Create Databricks Workspace
- On the Azure home screen, click ‘Create a Resource’

2. In the ‘Search the Marketplace’ search bar, type ‘Databricks’ and you should see ‘Azure Databricks’ pop up as an option. Click that option.
3. Click ‘Create’ to begin creating your workspace.
4. Use the same resource group you created or selected earlier. Then, enter a workspace name.
5. Select ‘Review and Create’.
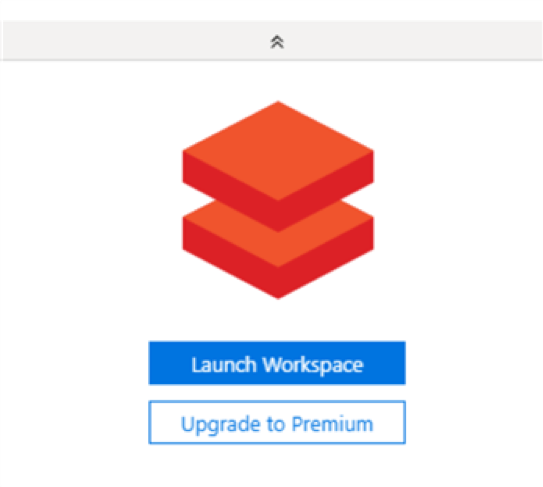
6. Once the deployment is complete, click ‘Go to resource’ and then click ‘Launch Workspace’ to get into the Databricks workspace.
Integrate ADLS with Databricks:
There are four ways of accessing Azure Data Lake Storage Gen2 in Databricks:
- Mount an Azure Data Lake Storage Gen2 filesystem to DBFS using a service principal and OAuth 2.0.
- Use a service principal directly.
- Use the Azure Data Lake Storage Gen2 storage account access key directly.
- Pass your Azure Active Directory credentials, also known as a credential passthrough.
Let’s use option 3.
1. This option is the most straightforward and requires you to run the command, setting the data lake context at the start of every notebook session. Databricks Secrets are used when setting all these configurations
2. To set the data lake context, create a new Python notebook, and paste the following code into the first cell:
spark.conf.set(
"fs.azure.account.key.<storage-account-name>.dfs.core.windows.net",
""
)
3. Replace ‘<storage-account-name>’ with your storage account name.
4. In between the double quotes on the third line, we will be pasting in an access key for the storage account that we grab from Azure
5. Navigate to your storage account in the Azure Portal and click on ‘Access keys’ under ‘Settings’.
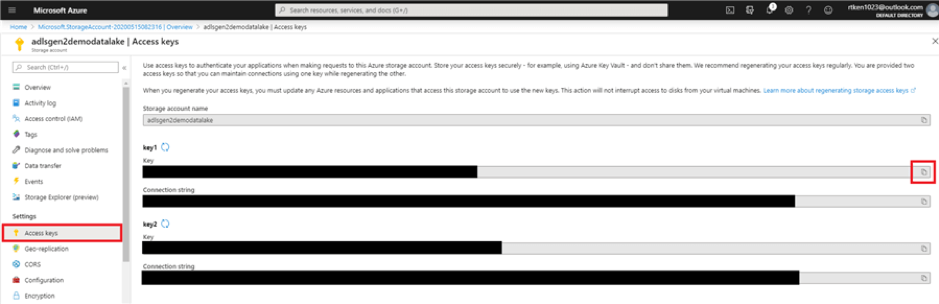
6. Click the copy button, and paste the key1 Key in between the double quotes in your cell
7. Attach your notebook to the running cluster and execute the cell. If it worked, you should see the following:

8. If your cluster is shut down, or if you detach the notebook from a cluster, you will have to re-run this cell to access the data.
9. Copy the below command in a new cell, filling in your relevant details, and you should see a list containing the file you updated.
dbutils.fs.ls("abfss://<file-system-name>@<storage-account-
name>.dfs.core.windows.net/<directory-name>")
Load Data into a Spark DataFrame from the Data Lake
Towards the end of the Error! Reference source not found. section, we uploaded a sample CSV file into ADLS. We will now see how we can read this CSV file from Spark.
We can get the file location from the dbutils.fs.ls command we ran earlier – see the full path as the output.
Run the command given below:
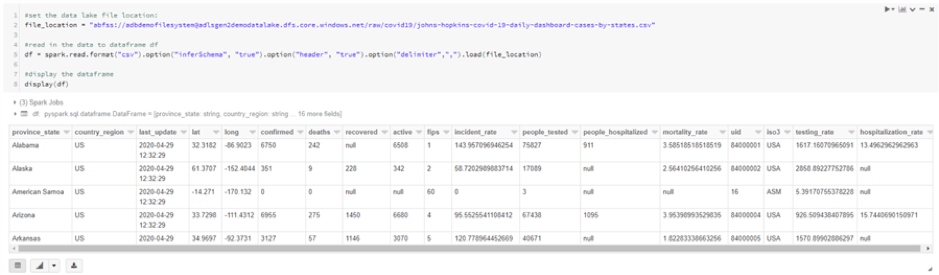
#set the data lake file location:
file_location = "abfss://[email protected]/raw/covid
19/johns-hopkins-covid-19-daily-dashboard-cases-by-states.csv"

#read in the data to dataframe df
df = spark.read.format("csv").option("inferSchema", "true").option("header",
"true").option("delimiter",",").load(file_location)

#display the dataframe
display(df)
Create a table on top of the data in the data lake
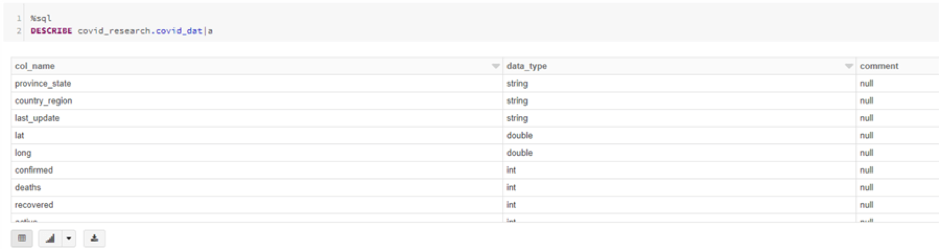
In the previous section, we loaded the data from a CSV file to a DataFrame so that it can be accessed using python spark API. Now, we will create a Hive table in spark with data in an external location (ADLS), so that the data can be access using SQL instead of python code.
In a new cell, copy the following command:
%sql
CREATE DATABASE covid_researc
Next, create the table pointing to the proper location in the data lake.
%sql
CREATE TABLE IF NOT EXISTS covid_research.covid_data
USING CSV
LOCATION 'abfss://[email protected]/raw/covid
19/johns-hopkins-covid-19-daily-dashboard-cases-by-states.csv'
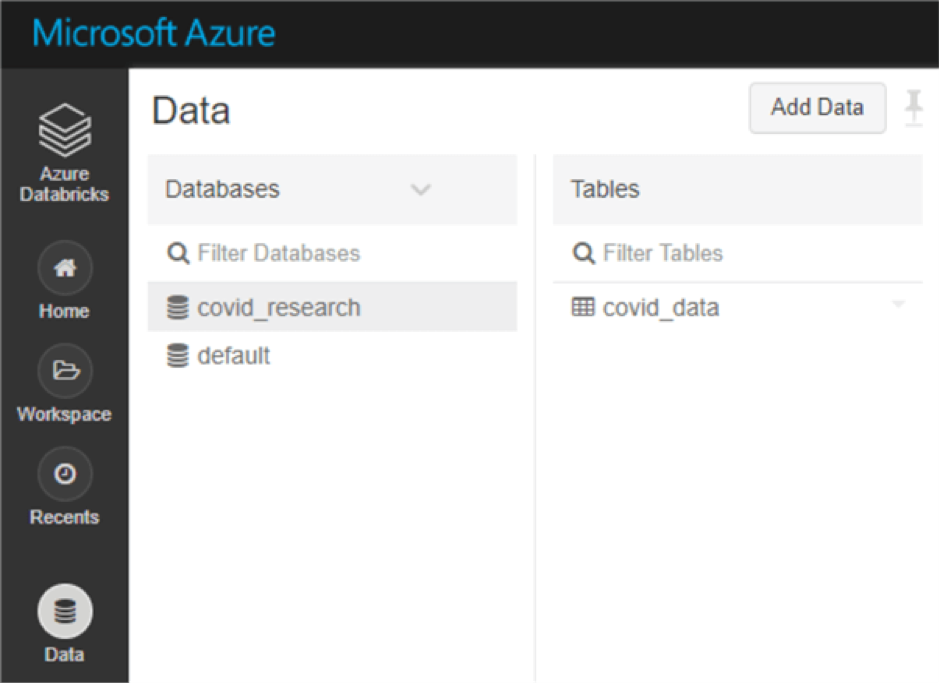
You should see the table appear in the data tab on the left-hand navigation pane.
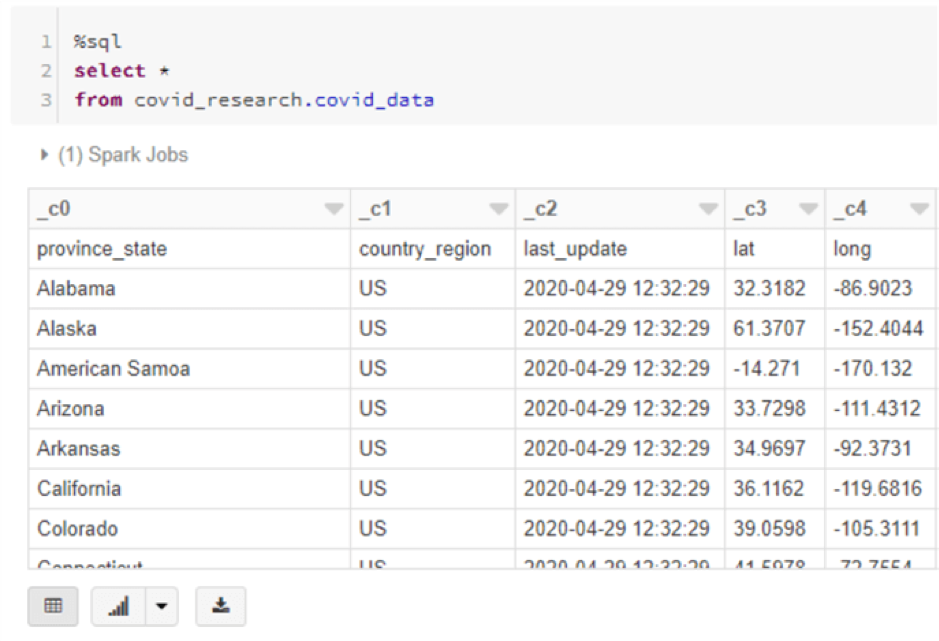
Run a select statement against the table.
%sql
CREATE TABLE IF NOT EXISTS covid_research.covid_data
USING CSV
LOCATION 'abfss://[email protected]/raw/covid1
9/johns-hopkins-covid-19-daily-dashboard-cases-by-states.csv'
OPTIONS (header "true", inferSchema "true")
That concludes our step-by-step guide on accessing Azure Data Lake Storage Gen2 in Databricks, using the ADLS Gen2 storage account access key directly.
Hope you found this guide useful, stay tuned for more.
Share this:
CloudIQ is a leading Cloud Consulting and Solutions firm that helps businesses solve today’s problems and plan the enterprise of tomorrow by integrating intelligent cloud solutions. We help you leverage the technologies that make your people more productive, your infrastructure more intelligent, and your business more profitable.
LATEST THINKING
INDIA
Chennai One IT SEZ,
Module No:5-C, Phase ll, 2nd Floor, North Block, Pallavaram-Thoraipakkam 200 ft road, Thoraipakkam, Chennai – 600097
© 2023 CloudIQ Technologies. All rights reserved.